In this article we are going to see how we can change host name in Ubuntu.
Why this is useful?
If you are managing VMs, more often you keep preconfigured VMs and when you need a new one, you copy and use that same. I have been doing the same since 2009. So, when you COPY a VM, you get old names & IP configurations. So, you need to change it based on your new requirements.
This may not be applicable for docker like environments. But I am using similar technique for proxmox VMs & LXCs.
Required Command
I will be using hostnamectl command to make this happened.
My Old configuration
After logging in, if I run this command hostnamectl, then I will see this
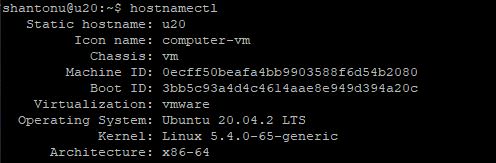
You can see this is u20. u20 stands for ubuntu 20 lts server, this is like preconfigured VM which i copy to use in different purposes so that I can skip installation ,network configurations, initial package update.
Step 1 : Change the host name
When I run this :
sudo hostnamectl set-hostname jenkins
This will make my host name u20 to jenkins.
Step 2 : Change host file entry
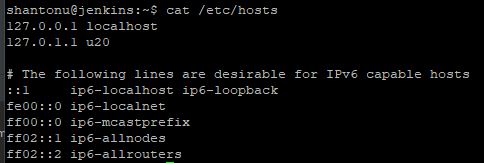
As my preconfigured vm has old name in hosts file /etc/hosts, I have to change this. Before change let’s see what s the value.
If I run in command line cat /etc/hosts, I will see this
Now, edit this file.
sudo nano /etc/hosts
Change the value from u20 to jenkins. That’s it.
Step 3 : Reboot
- Let’s reboot the vm
sudo reboot
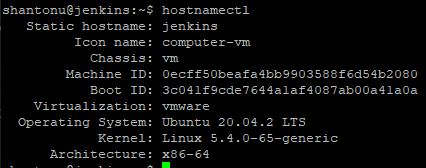
When you are logging in , you should see the changes. To verify, after logging in
- Let’s check Host name using
hostnamectl
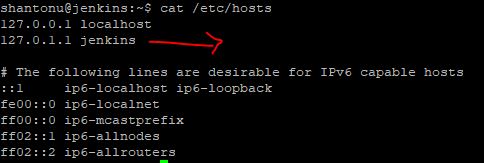
- Let’s check hosts
/etc/hostsfile with this commandcat /etc/hosts
That’s all. Thanks :)