In this article we are going to see how we can we install and use pi-hole.
What is pi-hole?
Pihole is a DNS blocker. It blocks unwanted DNS queries requested by sites.
Now you may ask, how do I know when DNS queries are requested? You need to get back to basics of how WEB works (http/https). These are very basic
Why pi-hole?
We will be using pi-hole to block
- Advertisements
- Adult Contents
- Spammy sites
- Known sites where we don’t allow devices to go. (harmful and know spams)
This is DNS level blocking, so, it is not network blocking. If direct IP request happens, pi-hole cant stop as there is no DNS query involve.
How this is useful
- To have filtered/clean internet
- If you have kid in you home, its necessary.
- Avoid internet spam & viruses
- Using pi-hole, we can avoid advertisements to a certain level in pc/mobile/tablet/smart tv.
How to use in Android
- Usually a linux systems need root privilege to change DNS address. To make life easy, you can use any of these apps. I am using this app
How to use in IOS
As i do not have IOS devices, i can’t show you any screenshots but, if you can follow basic DNS changing steps for IOS, it should be ok. This link might help you
How to use in Windows
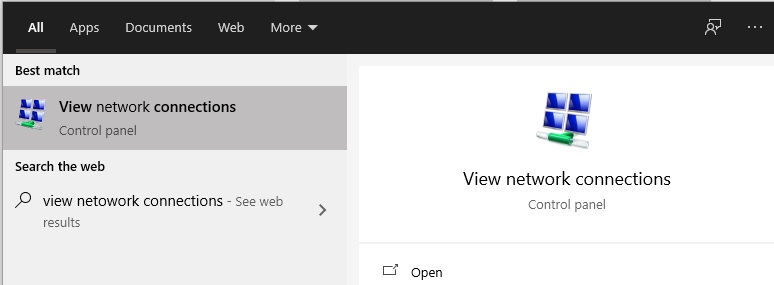
In windows 10 , from start menu, type view network connections and you should see this
Click open and see your network devices.
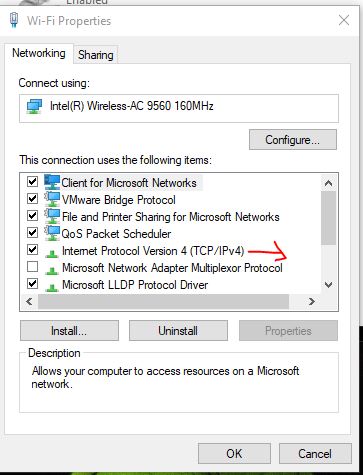
In my case, I will use wifi. Right click and open Properties. You will see this
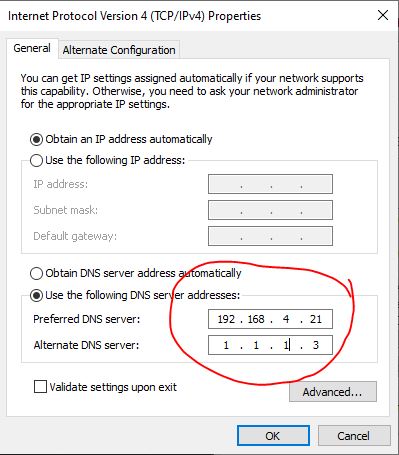
Double click TCP/IPv4 & you will see a popup. Change DNS entry like following
- Primary DNS , pihole IP
192.168.4.21. - Secondary DNS
1.1.1.3, i am using cloudflare, you can use google also8.8.8.8.
Notes
- Usually DNS queries are cached. So, before applying this your device ,please either clear DNS cache or reboot(this should clear DNS cache).
- You may need admin rights to make changes in DNS address
- You can use pi-hole address in your router, in that case, you don’t need to change DNS address to any device manually. All devices connected to router will go through pi-hole.
How to install pi-hole
Get Installer running :
- Using CURL
sudo curl -sSL https://install.pi-hole.net | bash
- Manually using Git
git clone --depth 1 https://github.com/pi-hole/pi-hole.git Pi-hole
cd "Pi-hole/automated install/"
sudo bash basic-install.sh
- Manually using WGET
wget -O basic-install.sh https://install.pi-hole.net
sudo bash basic-install.sh
- You should see a Welcome Screen . Press ENTER(OK) and then you should see
- A donate link of paypal. Press OK. And you should see a windows Static IP Needed to inform you that, you should have static IP. Press Ok.
- You should see Select Upstream DNS Provider. To use your own, select Custom window. I will select cloudflare, you can select any . Press OK.
- You may be prompt for block list,where you may need to choose(updated)
- A widnow to select which IP version ,i select IPv4.
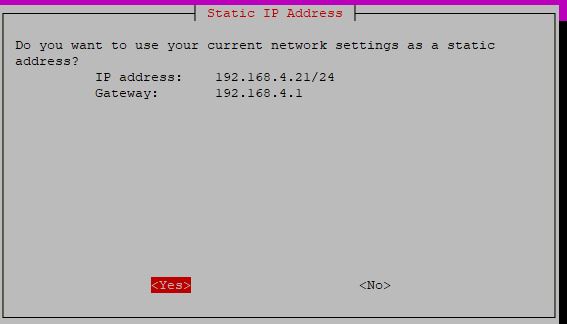
- Confirming window static IP address , press YES and
- A window to confirm Admin web interface. I selected on & ok. As we will see admin screen amd try to manage with web gui.
- A window to ask for which http server you need to tun for Admin gui. Select ON.
- A window to confirm LOG dns queries. I select On & OK. This will allow us to see the queries.
- A window to show privacy mode, I have selected 0 to show all.
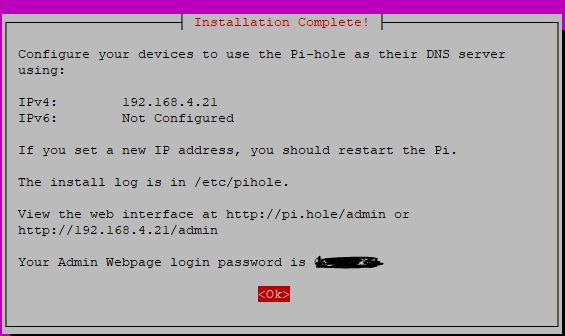
- At the end, a window to show you completion messages with admin password. I always change this password following
piholecli commands.
pi-hole cli commands
- To Change Admin Password
pihole -a -p& provide a new password twice. - Add asite.com in blacklist
pihole -b asite.com - Update pihole
pihole -up - Flash logs
pihole -f - Disable pihole
pihole disable - Enable pihole
pihole enable - Pihole status
pihole status
Pi-hole Admin GUI
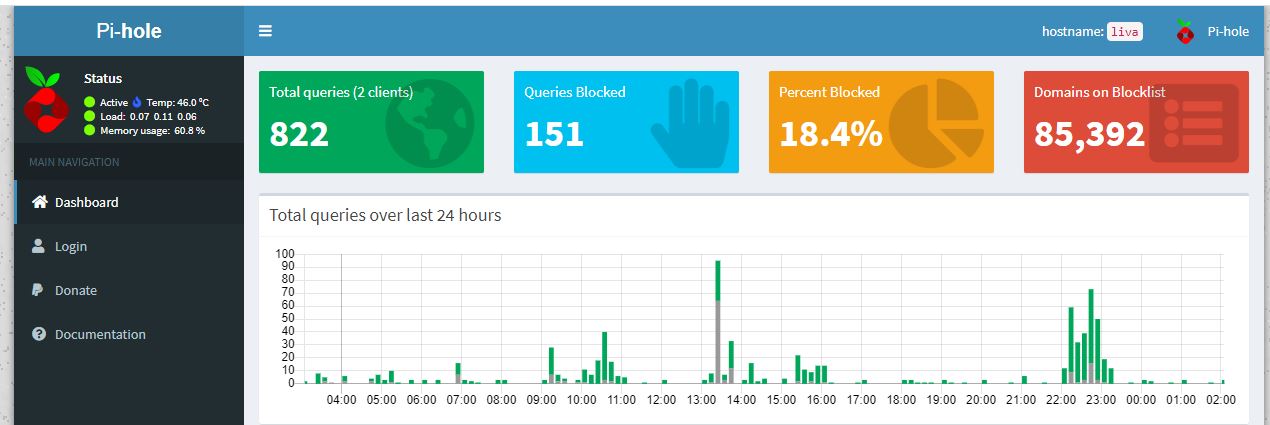
- Home Page with no log in
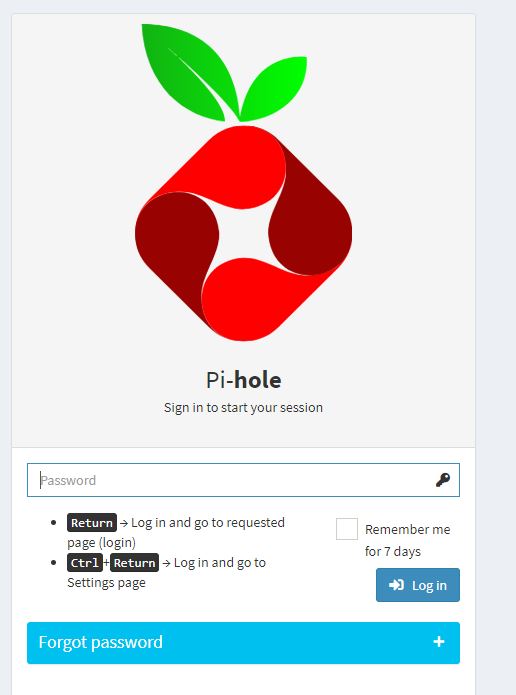
- Login Page
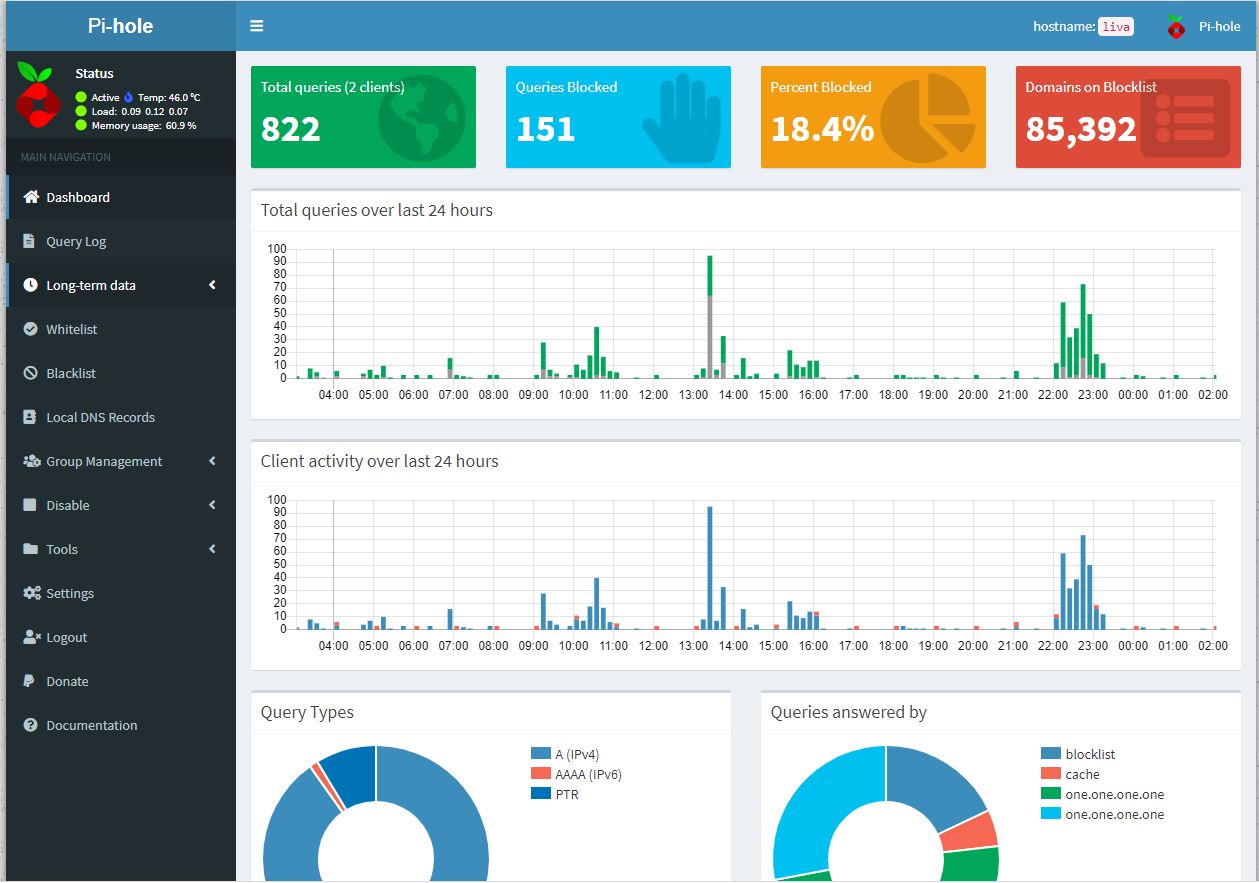
- Home Page
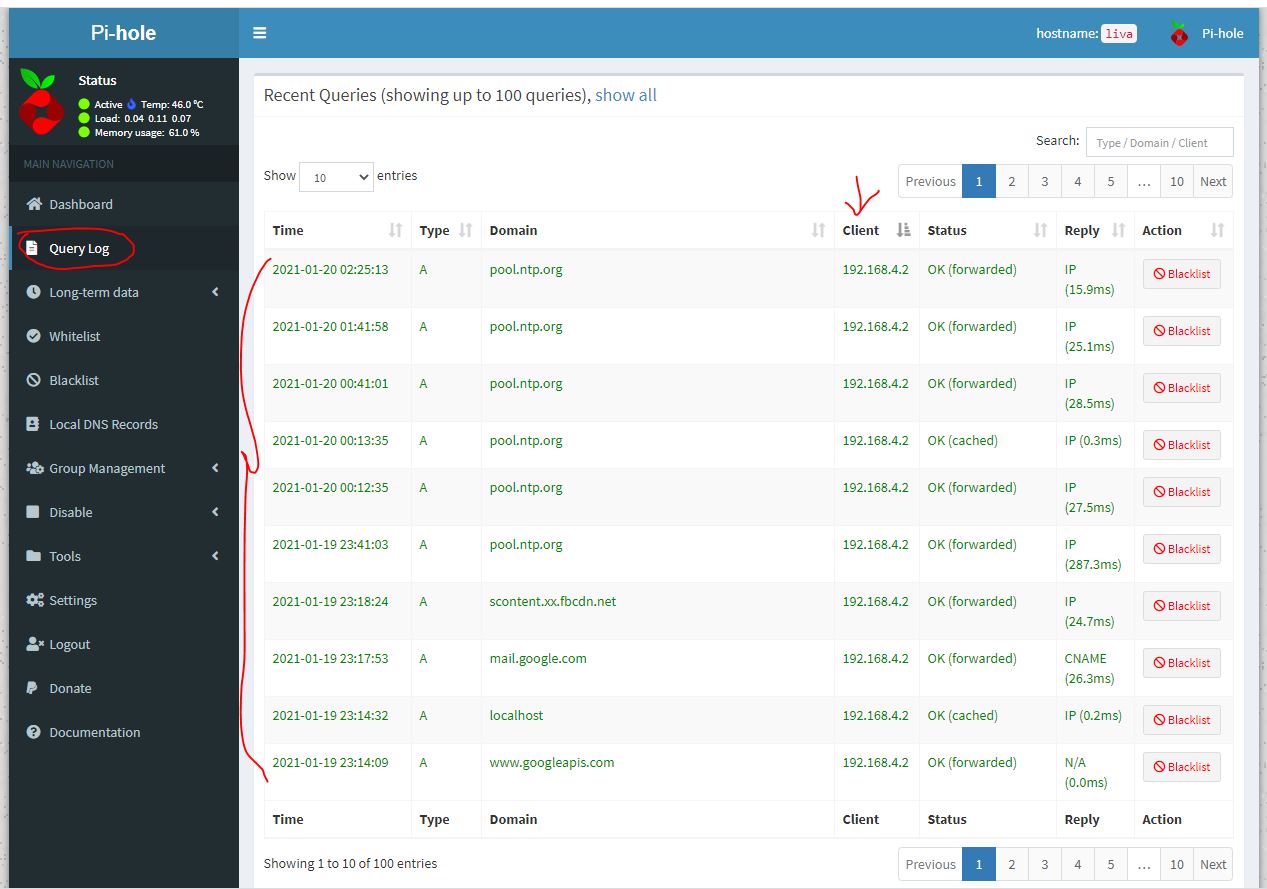
- Query Log to see blocking status.
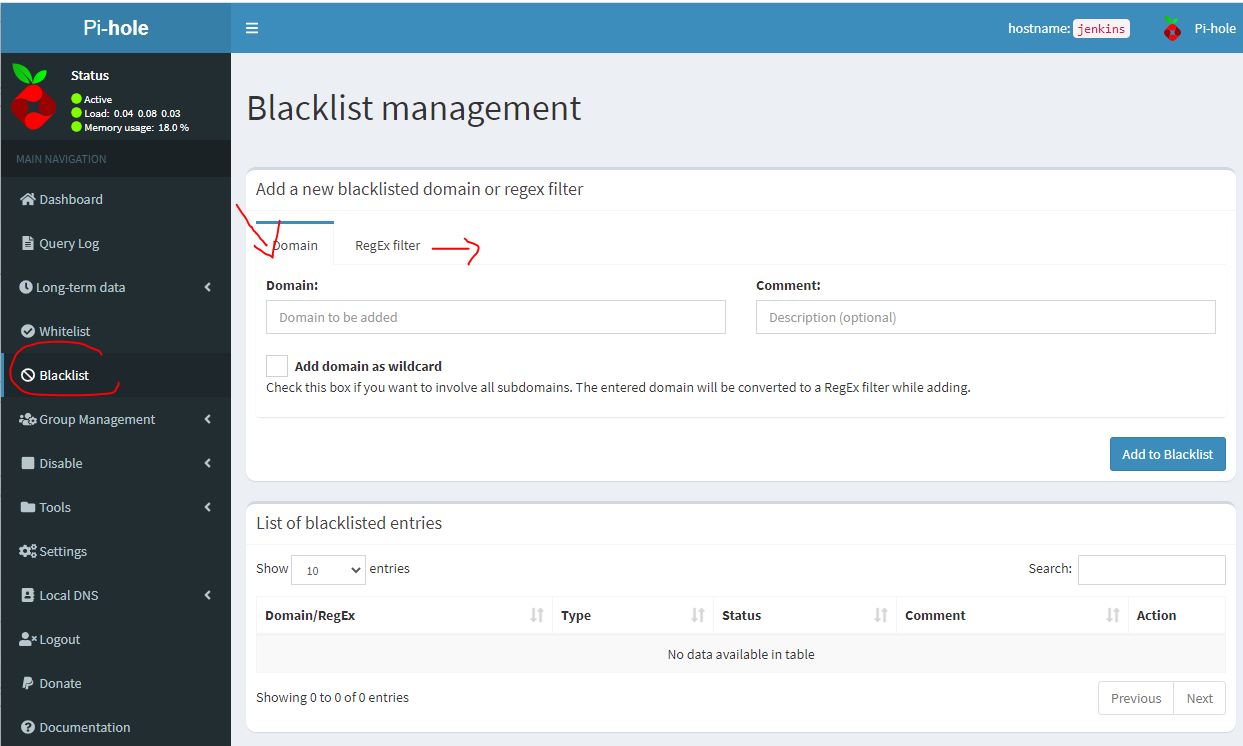
- Own Block list using web GUI
More CLI Options
Usage: pihole [options]
Example: 'pihole -w -h'
Add '-h' after specific commands for more information on usage

Whitelist/Blacklist Options:
  -w, whitelist       Whitelist domain(s)
  -b, blacklist       Blacklist domain(s)
  --regex, regex      Regex blacklist domains(s)
  --white-regex       Regex whitelist domains(s)
  --wild, wildcard    Wildcard blacklist domain(s)
  --white-wild        Wildcard whitelist domain(s)
                        Add '-h' for more info on whitelist/blacklist usage

Debugging Options:
  -d, debug           Start a debugging session
                        Add '-a' to enable automated debugging
  -f, flush           Flush the Pi-hole log
  -r, reconfigure     Reconfigure or Repair Pi-hole subsystems
  -t, tail            View the live output of the Pi-hole log

Options:
  -a, admin           Web interface options
                        Add '-h' for more info on Web Interface usage
  -c, chronometer     Calculates stats and displays to an LCD
                        Add '-h' for more info on chronometer usage
  -g, updateGravity   Update the list of ad-serving domains
  -h, --help, help    Show this help dialog
  -l, logging         Specify whether the Pi-hole log should be used
                        Add '-h' for more info on logging usage
  -q, query           Query the adlists for a specified domain
                        Add '-h' for more info on query usage
  -up, updatePihole   Update Pi-hole subsystems
                        Add '--check-only' to exit script before update is performed.
  -v, version         Show installed versions of Pi-hole, Web Interface & FTL
                        Add '-h' for more info on version usage
  uninstall           Uninstall Pi-hole from your system
  status              Display the running status of Pi-hole subsystems
  enable              Enable Pi-hole subsystems
  disable             Disable Pi-hole subsystems
                        Add '-h' for more info on disable usage
  restartdns          Full restart Pi-hole subsystems
                        Add 'reload' to update the lists and flush the cache without restarting the DNS server
                        Add 'reload-lists' to only update the lists WITHOUT flushing the cache or restarting the DNS server
  checkout            Switch Pi-hole subsystems to a different GitHub branch
                        Add '-h' for more info on checkout usage
  arpflush            Flush information stored in Pi-hole's network tables
So, that’s all. To make this post smaller I have skipped most of webgui options, I would suggest you can explore that.
